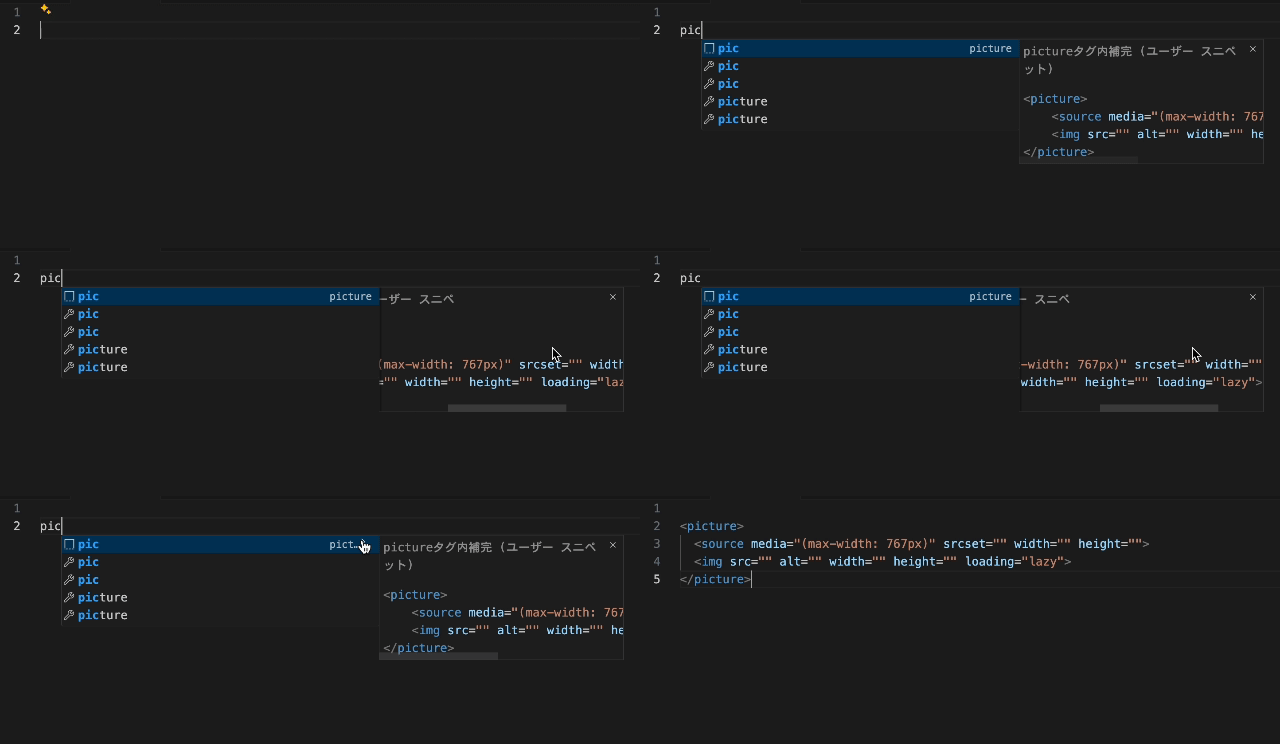
Web制作に便利なVisual Studio Codeのコードスニペット
投稿日:
更新日:
コードスニペットとは
よく使うソースコードを短いキーワードを入力することで簡単に挿入することができる機能です。
以下、Visual Studio Code(以下、VS Code)でpicと入力するとpictureタグのコードを挿入するコードスニペットです。

VS Codeでユーザースニペットを設定する
VS Codeではユーザースニペットを設定することができます。
まず、右下の歯車アイコンから「ユーザースニペット」を選択します。

するとスニペットを設定できる言語別のファイルが選択できるので、設定したい言語名の<言語名>.jsonを選択し、JSONファイルを開きます。

スニペットファイルを開くとデフォルトでは以下のような記述が入っています。
html.json
{
  // Place your snippets for html here. Each snippet is defined under a snippet name and has a prefix, body and
  // description. The prefix is what is used to trigger the snippet and the body will be expanded and inserted. Possible variables are:
  // $1, $2 for tab stops, $0 for the final cursor position, and ${1:label}, ${2:another} for placeholders. Placeholders with the
  // same ids are connected.
  // Example:
  // "Print to console": {
  //  "prefix": "log",
  //  "body": [
  //    "console.log('$1');",
  //    "$2"
  //  ],
  //  "description": "Log output to console"
  // }
}
ここに以下のようにしてスニペットを追加していきます。
複数のスニペットを設定する場合はカンマ,で囲ってください。
html.json
{
  // Place your snippets for html here. Each snippet is defined under a snippet name and has a prefix, body and
  // description. The prefix is what is used to trigger the snippet and the body will be expanded and inserted. Possible variables are:
  // $1, $2 for tab stops, $0 for the final cursor position, and ${1:label}, ${2:another} for placeholders. Placeholders with the
  // same ids are connected.
  // Example:
  // "Print to console": {
  //  "prefix": "log",
  //  "body": [
  //    "console.log('$1');",
  //    "$2"
  //  ],
  //  "description": "Log output to console"
  // }
  "noindex": {
    "prefix": "noindex",
    "body": [
      "<meta name=\"robots\" content=\"noindex, nofollow\">",
    ],
    "description": ""
  },
  "picture": {
    "prefix": "pic",
    "description": "pictureタグ内補完",
    "body": [
      "<picture>",
      "\t<source media=\"(max-width: 767px)\" srcset=\"\" width=\"\" height=\"\">",
      "\t<img src=\"\" alt=\"\" width=\"\" height=\"\" loading=\"lazy\">",
      "</picture>"
    ]
  }
}
任意のスニペットを追加する
コードスニペットを作成する際は以下のサイトを使用して、生成されたコードを対象の言語のJSONファイルに設定するのが簡単です。
スニペット集
HTML (html.json)
html.json
{
  "noindex": {
    "prefix": "noindex",
    "description": "noindexを設定する",
    "body": ["<meta name=\"robots\" content=\"noindex, nofollow\">"]
  },
  "picture": {
    "prefix": "pic",
    "description": "pictureタグ内補完",
    "body": [
      "<picture>",
      "\t<source media=\"(max-width: 767px)\" srcset=\"\" width=\"\" height=\"\">",
      "\t<img src=\"\" alt=\"\" width=\"\" height=\"\" loading=\"lazy\">",
      "</picture>"
    ]
  },
  "lazy loading": {
    "prefix": "lz",
    "description": "loading=\"lazy\"",
    "body": [
      "loading=\"lazy\""
    ]
  },
  "decoding": {
    "prefix": "da",
    "description": "decoding=\"async\"",
    "body": [
      "decoding=\"async\""
    ]
  },
  "php": {
    "prefix": "php",
    "description": "PHPタグの挿入",
    "body": ["<?php $1 ?>"]
  }
}
CSS (css.json)
css.json
{
  "charset": {
    "prefix": "char",
    "description": "@charset \"UTF-8\";の挿入",
    "body": [
      "@charset \"UTF-8\";"
    ]
  },
  "poss": {
    "prefix": "poss",
    "description": "position: sticky;の挿入",
    "body": [
      "position: sticky;"
    ]
  },
  "pic": {
    "prefix": "pic",
    "description": "place-items: center;の挿入",
    "body": [
      "place-items: center;"
    ]
  }
}